Now we hopefully have a whole card filled up with great smoke photos! What do you do now? Let's go over a little post production things you can do to your photos.
I'll be giving instructions for photoshop. Elements should work just fine for this. Really simple editing.
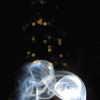
Open your favorite smoke image and first thing is to look it over and see any obvious mistakes that need to be touched up or cropped out. Then open up your levels and drop the blacks down just a bit to be sure your background is totally black. Don't over do it or you'll start to lose important smoke details. From here there are a couple different things you can do.
1. Open your hue saturation and bump up the saturation to bring out the natural colors, usually like a blue or green. or 2. Open up Hue Saturation and click colorize - then use the hue and saturation sliders to pick a color and saturation that you like. or 3. Invert your image so the background is now white and your smoke is black. Then go back and repeat steps 1 or 2. or 4. (my favorite) Invert your original image and clean up any areas of the background that you can see, with the dodge tool, or a white feathered paint brush.
Add a new layer above your smoke layer and then using a large, feathered paintbrush start coloring stripes across the whole layer, don't worry about going outside the lines. Once you have all colored the way you like, then change your blending mode to "color" and wa-la.
These are a few of the things you can do to your photos in post to give them some POP. Please post picture of any pictures you take using these methods, I'd love to see them and also post any other methods you use in post production to your smoke pictures so we can all try them out!

